In some cases, you may want to provide a local version of a font instead of using a font provider. A likely scenario is that you purchased a font with appropriate licensing and have built a web-downloadable kit for that font. For example, here are the options you have when you download a kit from myfonts.com

To add this web font locally to @font-your-face, first check that you have enabled the "Local Fonts" module that comes bundled with @font-your-face module.
Next browse to Configuration > User Interface > @font-your-face settings. On the top of that page you will now have two tabs "General" and "Import Local Font" - click on "Import Local Font."
The next screen will look like this.
You will need to fill out this form for each different font style you have, meaning if you want to include "aviano sans regular", "aviano sans bold" and "aviano sans italic" you are going to have to fill out this form for each one. For this example, we will use "aviano sans regular."
1. In the first field, put the name and style of the font that you will refer to it by. For example, "Aviano Sans Regular."
2. Select the appropriate font style/weight in the two drop-downs (for "Aviano Sans Regular" we will choose "normal" for both of these. Use accordingly.
3. In the 4 file upload areas, this is where you will upload the appropriate file for each extension. As the fields specify, certain browsers/devices only support certain formats. So, for example, if you want IE 5-8 to show your font, you need to upload an EOT font file. When you download your web font kit (see above) you can likely choose all of these options.
Save the form, and continue adding more local font styles as needed.
After you've added all of the local fonts you want, you need to enable them. Browse to Appearance > @font-your-face and then click the link to "Browse to enable more fonts." You should have a tab that says "Local Fonts" - click this and you will see the fonts you added. Enable your desired fonts.
Now click the "Enabled Fonts" button on the top right area of your screen.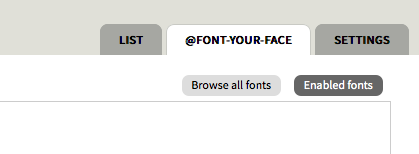
Now you will see your enabled local fonts in the list, and you can apply a CSS selector to it. Alternatively, you can click the "By CSS Selector" link to instead choose a selector and then apply a font. You can also create a custom class selector and then apply your font, like so:

You should now see your font working on the applied selectors. You can also directly apply your local font through your CSS using the font delcaration name you gave when you uploaded it.
Note: If you click on the "In Theme" button in the @font-your-face appearance settings, you will get what looks like an error where it will say
; Local font 'YOUR FONT NAME' can not be included in a theme.info file,
; because it can not be loaded via URL.
As noted in #1981872: Local font works in back-end; does not work in front-end comment #7, this is not a bug. So if you're not seeing your local fonts, something else may be wrong. Reading issue #1981872: Local font works in back-end; does not work in front-end in its entirety may help you to debug your problem in that it's likely a format or browser issue.
| Attachment | Size |
|---|---|
| local-fonts.png | 88.87 KB |
| myfontsdotcom.png | 75.78 KB |
| enabled.png | 14.21 KB |
| custom.png | 21.12 KB |
| local.png | 41.63 KB |